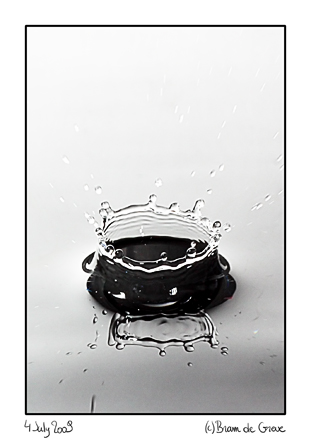
splashing water drops
July 31st, 2009Earlier this month, on a warm lazy Saturday, I was sitting idle in the flowery garden. Tired of reading books, I decided to setup a little studio under the walnut tree and shoot some water drops. The idea is very simple: hang a bag of water above a filled basin, and make a tiny hole so you get a slow but steady flow of drops splashing on the water surface below. Aim a speedlite at a white background, and shoot away!
There are a few things you have to keep in mind though:
- You’re actually photographing the background reflected by the water, so aim your speedlite at the backdrop, not at the water surface itself. I’ve had a boring white one. Use more colourful backgrounds to get more interesting patterns.
- You want to cut down the light transmitted through the water surface as you only want to see the reflection. Although you can use an opaque liquid, it’s sufficient to use a basin with a black bottom.
- Use the speedlite as your shutter. You really want to freeze time, and a short flash of light is the way to do so. Ironically, this means that you must use a relatively long shutter speed (1/250 s) to get a good synchronization with your speedlite, but if you underexposure the environment by a few stops, the scene will be entirely lighted by the flash. As most speedlites regulate the power output by the pulse length, decrease power to get a flash as short as possible.
- Be a hoopy frood and know where your towel is ;)
Below you can see my makeshift studio. I was using a light grey basin, so to combat transmission, I’ve put in the water a torn apart black paper bag. My Canon EOS 50D with a 50mm f/1.8 lens is sitting on the tripod and is connected to an old Minolta speedlite using a PC cable. You can see the Minolta firing and lighting the white backdrop (yes, this means I temporarily connected it to my spare camera instead ;-). On top, you can see the bag of water hanging from a branch. The red arrow shows the tiny hole as the source of the water drops.
Although an outdoor studio is great to spend a warm summer day, it isn’t ideal for this kind of work as the tiniest sigh of wind will rock the water bag so that the point of impact changes all the time. This makes it very hard focussing correctly.


November 18th, 2010 at 6:09 am
Hi man …
I found your article really nice .. i did the pratically the same test , and i got nice results too …
I need a Flash , but don’t have money for expensive ones , could you tell me wich one did you used with the 50D … and wich cable is used to relate the Flash and the Camera !! :D
PeacE
November 18th, 2010 at 12:55 pm
Hi, thanks. You have a nice setup there as well. Nice results.
That was an old minolta speedlite I had lying around, but a Canon 430 EX II shouldn’t be too expensive. One drawback of the 430EXII is that it doesn’t have an connector for a PC cable (that’s for Prontor-Compur, not Personal Computer), only a hotshoe. So you have to use an adapter like Kaiser’s or Hama’s. The benefit of Kaiser’s is that it has a tripod bush, but be careful, they also exist without. Between the flash and the camera, I used a normal PC-PC sync cable. Be sure to have the right male/male or male/female connectors, depending on what you need.
Bram