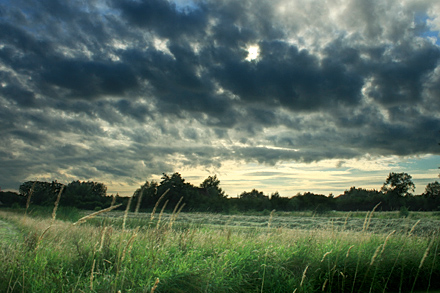
first HDR photo editing experiment
July 17th, 2007My first experiment in HDR (High Dynamic Range) photo editing. I’m a bit reluctant to use the term HDR, because technically, none of the images were ever stored in a HDR file format. Unless you count Canon’s RAW CS2 format as HDR, which I don’t. Not really anyway. I also do not count the use of 16 bit channels in Photoshop as HDR, as I didn’t use the extra 8 bits to extend my range, but merely to bump up the numerical precision of the editing.
Anyway, for you who know nothing about HDR, normal images like the one below that are stored in the JPEG format, have what is called a Low Dynamic Range (LDR). That’s because they use only 8 bits per colour channel, and that’s no where near enough to fit the typical range of an outdoor scene. If you want to grass look alright. you often will end up with an blown-out sky. If you aim for the sky, you end up with an underexposed ground. That’s where exposure bracketing comes in. It means that you take the same picture with different exposure settings, and then you merge them into one. You can either use HDRshop or Photomatix to get a single HDR picture that can represent colors beyond the limited 8 bit range, and tonemap it back into a regulare JPEG afterwards (because your screen can’t properly display HDR images, it’s an LDR device after all). Or, alternatively, you can fire up photoshop and try to merge the different exposures manually. That’s what I did.
The shots have been taken at 8 pm in the Gemene Weidebeek nature reserve, a 5 minutes walk from my home. It’s a 40 ha area that consists of common pastures with a creek running through. The name literally means Common Pasture Creek. I did three exposures, each two stops apart. I stacked them as layers in Photoshop, the brightest one on top. I used layer masks to mask block the sky of the top one, uncovering the well exposed sky of the one below. The darkest exposure was used to bring back some detail of the brightest part of the sky. I used levels to lighten up the foreground a bit more, using some dodging and burning to add some contrast.
I hope you like the result =) You can view a larger version in my gallery.


January 3rd, 2008 at 5:34 am
No matter how you did it, the result looks astonishingly well! Last human picture before the apocalypse…
January 3rd, 2008 at 6:03 am
Thanks! I’ll try to get a lift with a teaser before the planet is destroyed. Or a Vogon ship if it really must.